Has the present electricity surge made you spend thousands of bucks on your CPU? Because this is what I have been going through lately. Now, you must be thinking about how electric surges can mess up with your processor but trust me guys having a messed-up voltage can actually make you say goodbye to your CPU.
Let me explain this in simple words. See there are a number of tiny components in a CPU. The GPU, RAM, and other processing units. These components do require a set of voltage to work and have a specified amount of voltage capacity. If this voltage capacity is reduced or increased it will eventually make the components work in an unusual manner.
The first thing you need to do is ensure connectivity. The next step is to install the CPUZ software, and finally, compare the voltages, nothing to worry about, I have explained each step below in detail.
High voltage can actually destroy them and low voltage can make these components underperform. So, guys, you better know how to monitor CPU voltage. I didn’t have any idea how to do that but eventually, after a lot of trials, I found the right way to do so.
My today’s article explains how to monitor CPU Voltage so you don’t have to go through any hassle just like me.
How To Monitor CPU Voltage Using Tools? 3-Step Guide
Here are some quick steps you can use to monitor cpu voltage. Make sure to follow these steps carefully so as to have an easy time.
Step 1: Ensure Connectivity
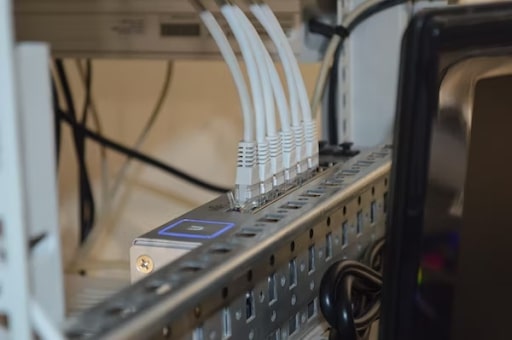
First of all the most important step is to ensure that your CPU is connected to a stable internet connection. If the internet connection is not stable then you might have a hard time installing the software to monitor CPU voltage. When your CPU is in a working state and the internet is not slow you are ready to proceed towards the next step.
Step 2: Install CPUZ Software

The next thing you need to do is to install a CPUZ software. You can find a number of software online that are helpful in monitoring CPU voltage. Make sure that the software you are going to select involves the list of all the voltage settings available in your BIOS.
If it lacks them then you might have to get additional software for monitoring other voltages. As soon as you have the software you can run it by opening it. After having it operational for a while you will get to see all the voltages your system has.
These will also have the option to showcase voltages for different components including the GPU and RAM.
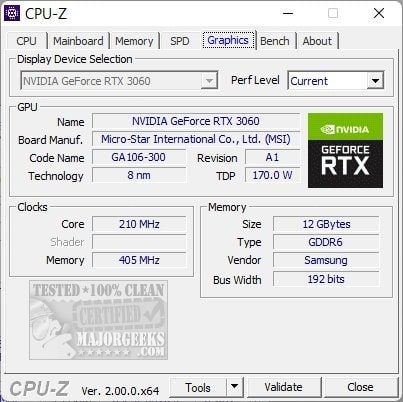
Step 3: Compare Voltages
This is the last step and here you have to go through the results you get from the CPUZ software tool. All you need to do is to check whether the voltages mentioned by the manufacturer are the same as the one you got in the tool or not.
If the readings are somehow not in accordance you need to try some other utility program. Despite this if the problem persists then you need to check the components. Also, if the readings are fine then you just need to check whether the voltages are fine or not.
In case the readings are a bit low or higher than the recommended value then you need to check if the CPU is properly mounted or not.
How To Monitor CPU Voltage Using BIOS? 4-Step Guide
If you do not want to rely over any tools to monitor CPU voltage in that case you can try the BIOS method as well. The method is a bit lengthy one but it gives some of the most accurate results.
Step 1: Unplug The Computer
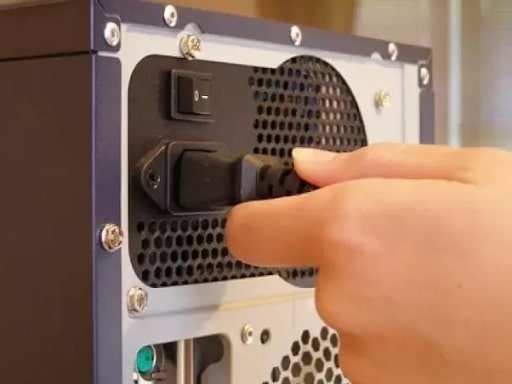
To monitor CPU voltage using its own BIOS you need to plug off the computer. This method cannot be applied while the computer is plugged in because it involves the risk of getting short circuit or damaging the components. All in all make sure that your computer is not plugged into power.
Step 2: Find The Jumper

Next thing you need to find out is the jumper where you can select your motherboard’s socket. It is usually 1, 2 or 3. You can check for the jumper details in the manual that comes with your motherboard. This jumper is going to play an important role in monitoring the voltage of the CPU.
Step 3: Remove Materials From The Jumper
This step is very important to have accurate results. Ensure that there are no external materials like plastic or cardboard covering the jumper. If there are any hindrances you might not be able to get the desired results. Once you have made sure that step 2 and 3 are completed then you are ready to proceed towards step 4.
Step 4: Read The Readings On Voltage Meter

This is the step where you will monitor the voltage of your CPU. You just have to transfer the pin 2 and 3 and after that plug the multimeter’s power cord into the pin 1.
Also, never forget to have the black lead attached to the metal casing of your CPU. Now, you will get to notice all the readings on your multimeter.
Lastly, just unplug the cord and replace the jumper to pin 1 for enabling the computer. You can plug in the computer power and the BIOS settings are now ready to access.
How To Lower CPU Voltage Consumption?
Never change CPU voltage for any kind of component unless you know how to do so. Again the components of the COU are way too fragile and can get overheated if you adjust the voltage oddly. If by chance you decrease or increase the voltage of your CPU do a stability test after making changes.
What Type Of Voltage Measurement System Does Your Motherboard Use?
Your CPU can either have a VRM or Vcore voltage measurement system. VRM stands for Voltage Regulation Module and Vcore means Core Voltage. VRM is used for fine-tuning the CPU power consumption while Vcore is used to measure the core voltage (Vcc) of your CPU.
The VRM uses a linear voltage regulator and the Vcore uses an ADC. Most of the ATX processors have VCore whereas the older systems might have VRM.
Conclusion
Hopefully, now you know how to monitor CPU voltage. To have your components last longer make sure you are using them at the voltage they are able to run properly. If you aren’t able to properly adjust the voltage of the CPU have some help from professionals as to not damage the components.