Have you been thinking to use more than 2 monitors altogether? If yes, then enabling your motherboard’s HDMI is the most important point here. Don’t know how to do that? No worries as our today’s guide is going to sort out every matter for you. In this article we will guide you how you can enable HDMI in just 5 steps.
How To Enable Motherboard HDMI? 5-Step Guide
Before beginning, make sure your motherboard supports HDMI. Most do, but some older models may not. Also verify that your motherboard has an HDMI port. If your motherboard doesn’t have an HDMI port, you’ll need to purchase an HDMI adapter. Here are 4 of the most straight forward steps to follow for enabling your motherboard HDMI.
Step 1: Inspect The Integrated Graphics Chip
To inspect the integrated graphics chip of a motherboard, first remove the motherboard from the computer. Next, remove the graphics card. Finally, inspect the graphics chip. The integrated graphics chip is responsible for rendering images on your screen. If it is not functioning correctly, images may not appear on your screen or may appear distorted.
However all of the motherboards are equipped with integrated graphics card chip. You can also try the method we explained before. If your motherboard doesn’t have an integrated graphics chipset, you’ll need to install a graphics card and turn on its corresponding chipset. Once you are confirmed that your motherboard has an integrated graphics card chip you need to proceed towards the next step.
Step 2: Turn On Integrated Graphics
step 2 involves turning on the integrated graphics chip on your motherboard. For this purpose you have to restart your computer. Next you have to Boot into the BIOS. Hold down the F2 or F12 key to enter the BIOS. However different motherboards might have different function keys to access BIOS. Now, under Graphics, make sure Integrated Graphics is enabled.
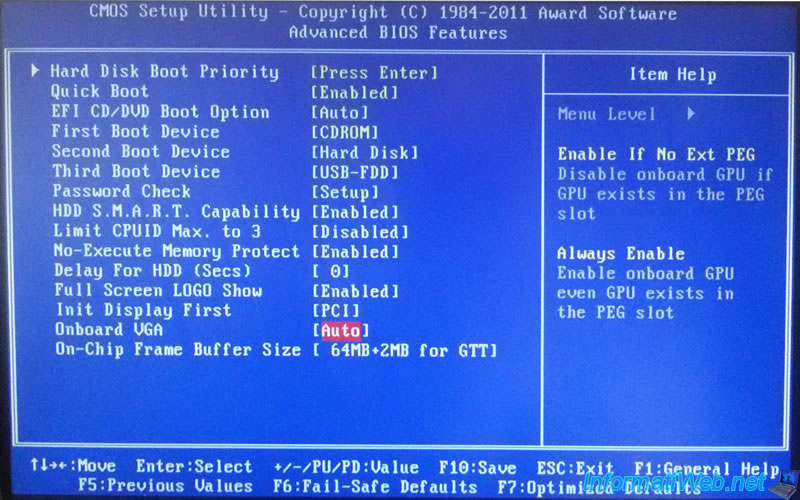
If the integrated graphics card is not enabled, you can enable it by going to the System Preferences app and clicking on the Graphics panel. From there, you can switch the integrated graphics card on or off. When you have made sure that the integrated graphics card is turned on you have to Exit the BIOS and restart your computer.
Step 3: Link Your Monitor To The System
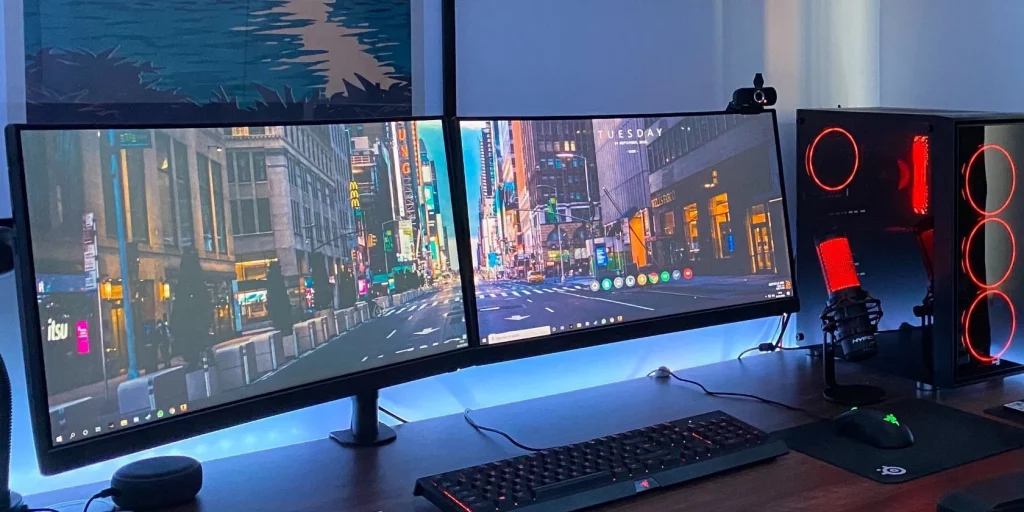
Of course you are going to enable is the motherboard HDMI so you definitely need to make sure you have a display or monitor that is properly linked to your system. Now before we get started you should note that you will be using a VGA cable to link the monitor to the system and this is because the HDMI port only supports digital signal.
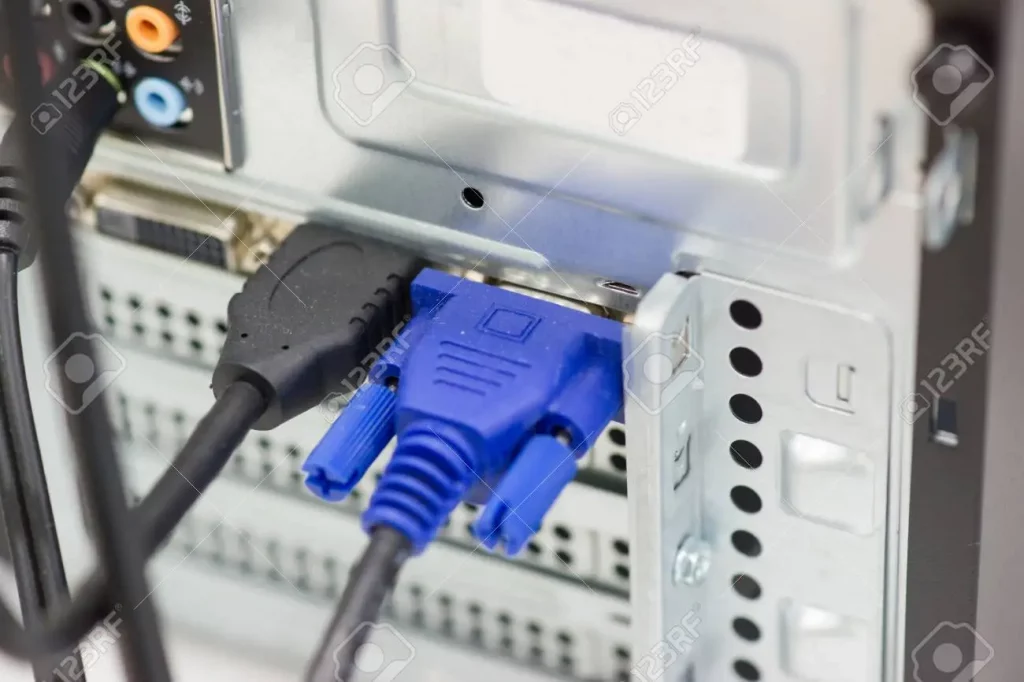
So if you have a standard monitor with an analog connection it will not work. For installing multiple monitors you have to open the Display menu on your computer and Select Settings. Next you have to select the monitor you would like to link to the system. Click the Link button and voila the work is done. But that’s not it follow to the next step for final results.
Step 4: Get The Latest Graphic Drivers Installed
There are a few ways to get the latest graphic drivers installed on your computer. One way is to go to the manufacturer’s website and look for the latest driver for your computer. Another way is to go to the Windows Update website and search for the latest drivers. However if your drivers are up to date you just have to enable them. In most cases you can also install them using the CDs that comes along your motherboard.
Step 5: Check The Results
Once the drivers are installed your motherboard HDMI is installed. Now all you need to check if it is working or not. To check if the motherboard HDDMI is enabled, use the following command: lsmod | grep HDMI. If the output shows that the HDMI module is enabled, then the motherboard HDDMI is enabled.
There are many reasons to enable motherboard HDMI. Some reasons include enabling HDMI for better graphics performance, connecting multiple monitors to one computer, and connecting a gaming console to your computer. For having these amazing features you need to enable motherboard HDMI.
What Is The Purpose Of Motherboard HDMI?
The motherboard HDMI output can be used to connect a HDMI monitor or TV to the computer. It is a key component in a computer system and it provides the interface between the computer system and external devices such as displays, projectors, and audio equipment.
It also acts as an interface to the monitor that is used to view the computer system on a television or other display. The motherboard HDMI is essential for the operation of all types of computers and it has become very popular in recent years.
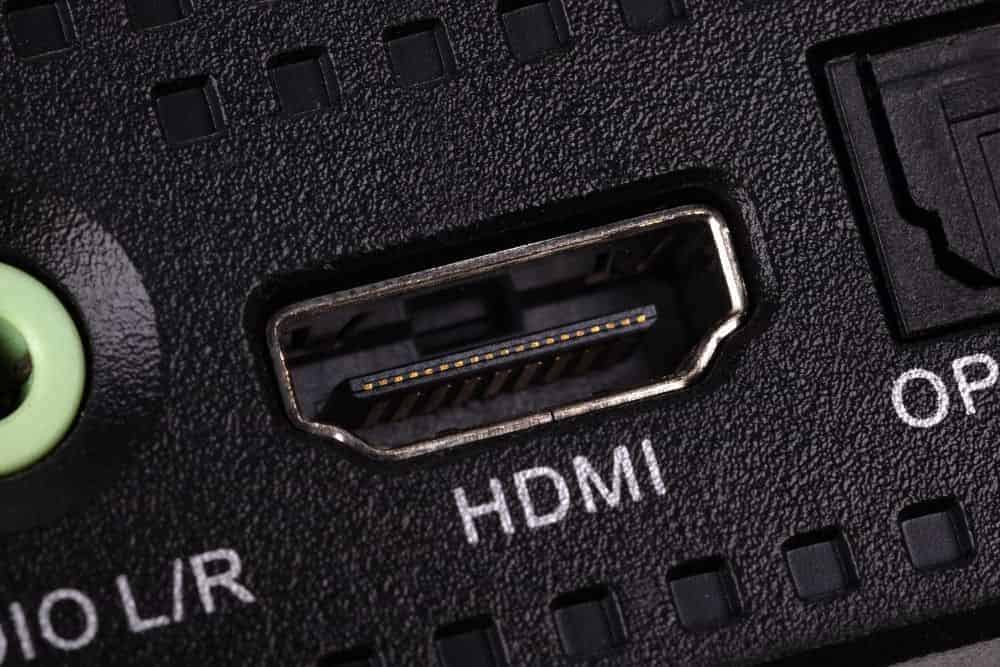
The HDMI is the most popular digital connection for transferring high definition video from one device to another. It is also known as High Definition Multimedia Interface. It can transmit uncompressed digital video data and audio data in a format known as HDMI
What Is The Main Reason To Enable Motherboard HDMI?
There are many reasons to enable motherboard HDMI. One reason is that motherboard HDMI allows you to connect your graphics card directly to your motherboard, bypassing your graphics card’s on-board graphics.
This can give you a faster and more stable experience when playing games or watching videos. Another reason includes increased Picture Quality. HDMI provides a much higher quality video output than traditional video ports.
This means that you will see sharper images and less distortion on your screen. This in turn will provide you a high-quality video output for connecting external devices such as a display, gaming console, or sound system. The other reason to enable motherboard HDMI is that it will allow you to use the VGA port for other purposes.
If you would like to know more about how to enable motherboard HDMI, then read on. We have provided information for both novice and expert users so that you can make the right decision when enabling motherboard HDMI. We will also show you the steps needed to enable motherboard HDMI.
Is It Safe To Enable Motherboard HDMI?
Ultimately, it depends on the model of motherboard, the features that it includes, and the version of Windows that is installed. There are, however, some general guidelines that can help you decide if it is safe to turn it on. Yes, it is safe to enable motherboard HDMI. Some motherboards have a built-in protection circuit that will disable the HDMI port if it detects a malfunction, so it is safest to consult with the manufacturer before enabling the port.
If you do enable the HDMI port, however, there are a few things to be aware of. For starters, the HDMI port is not a replacement for your current video card. While the HDMI port can accept video from a single source, it cannot run two or more simultaneously. This means that you will need to use the appropriate ports on your video card to connect other devices, such as a DVD player, Blu-ray player, game console, or set-top box. Another thing to be aware of is that the HDMI port is not protected from electrostatic discharge (ESD). In fact, the HDMI port is especially susceptible to ESD because it has a high amount of current flowing through it.
What Do I Need To Enable Motherboard HDMI?
You will need to enable your motherboard’s HDMI capability in order to use an HDMI cable to connect your laptop to an HDTV. Usually, this is done by entering the BIOS or UEFI settings and looking for a setting called HDMI or HDMI2.
For this purpose you don’t have to own any technical tools. You can do it with your bare hands and some common sense. In the next part of this article, we are going to discuss how to enable HDMI on every other system.
Do I Need To Purchase The Latest Motherboard To Enable Motherboard HDMI?
No, you do not need to purchase a motherboard with HDMI support to enable HDMI functionality. A typical motherboard will have several HDMI ports available. The only reason you would need to purchase a motherboard with HDMI support is if you are looking to upgrade your system. Otherwise your existing motherboard would all be set to enable motherboard HDMI.
If you have an old motherboard that does not have HDMI support then you may need to buy a new motherboard that does have HDMI support. All motherboards have a BIOS setting to enable or disable HDMI support. If your current motherboard does not have this setting then you will need to buy a motherboard with HDMI support to enable HDMI functionality.
What Things To Consider Before Enabling Motherboard HDMI?
Honestly speaking there are not so many things to consider before enabling motherboard HDMI. Because the process is simple and requires no special training. However, make sure your system has the below things.
Check For Integrated Graphics
It is an obvious requirement for enabling motherboard HDMI. Integrated Graphics are Graphics that are built into the CPU, rather than being an add-on. Integrated Graphics can be either dedicated or shared, and are more commonly found on low-end CPUs. Integrated Graphics are not as powerful as dedicated Graphics, and will generally only be able to run low-end games. However, integrated graphics are very important for enabling your motherboard HDMI.
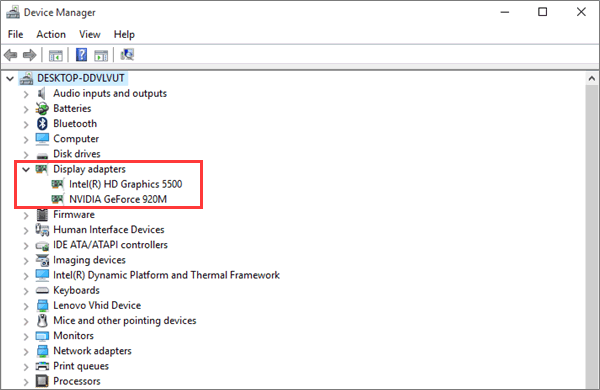
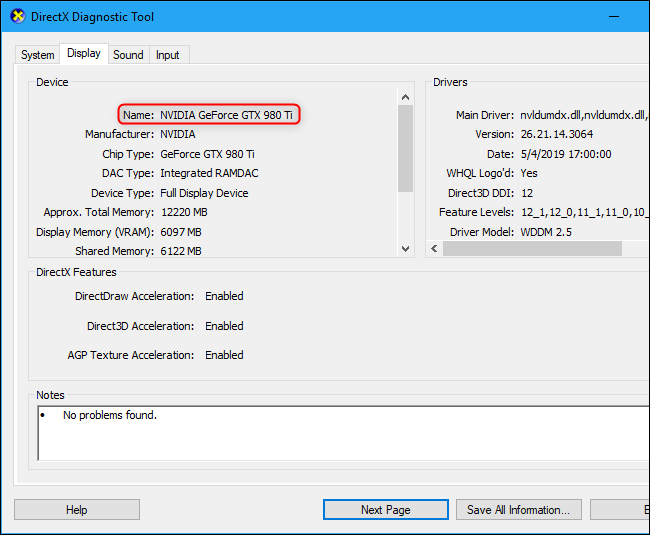
Don’t know how to check for integrated graphics card? No worries as we will tell you how to do that. To determine if your graphics card is integrated or not, open up a Windows explorer window and type dxdiag. If the window that pops up says This system is not currently configured to display graphics information, then your graphics card is integrated.
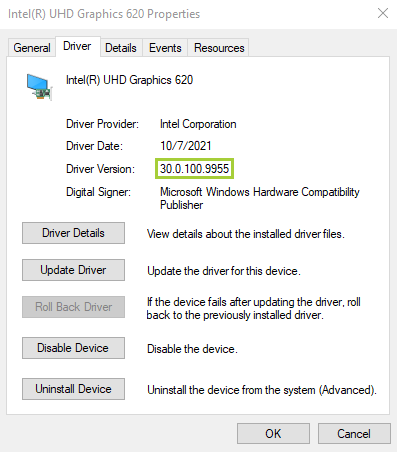
Install Latest Integrated Graphics Drivers
Make Sure You Have The Right Driver Installed The motherboard manufacturer usually provides a driver package for you to download and install. If you have an older motherboard or a motherboard that doesn’t support the latest version of Windows, then you should download the latest version of your graphics driver.
To check if you have the latest integrated graphic drivers installed, open Device Manager and look for the Display adapters category. If you see a yellow exclamation point next to any of the displays, this means that you do not have the latest drivers installed.
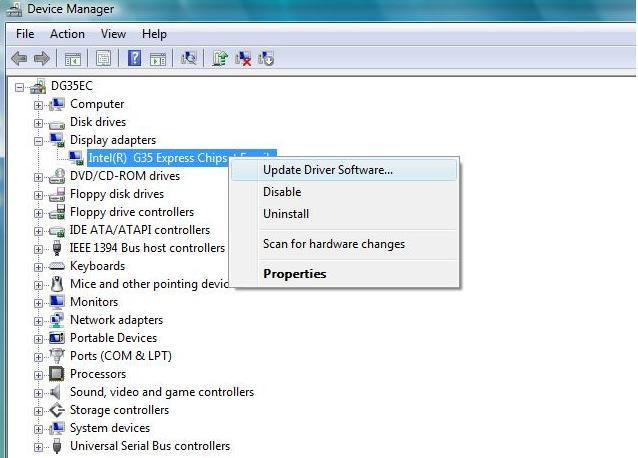
Click on the exclamation point and then click on “Update Driver.” If you are unsure how to update your drivers, refer to the manual that came with your motherboard or contact your motherboard manufacturer.
What Are The Benefits Of Enabling Motherboard HDMI?
There are many benefits to enabling motherboard HDMI. HDMI provides a more consistent video and audio experience by transferring data more quickly than traditional connections such as USB and PS2. This results in a smoother and crisper image, as well as less distortion.
What Are The Disadvantages Of Enabling Motherboard HDMI?
There are a few potential disadvantages of enabling motherboard HDMI. The first disadvantage is that it can increase the amount of heat that the motherboard produces. This can lead to potential issues with the motherboard and its components. Additionally, enabling motherboard HDMI can require additional hardware, which can add to the cost of the system.
Conclusion
Hopefully we have answered each and every query regarding how to enable motherboard HDMI and also made the process of enabling motherboard HDMI very straightforward for you. Make sure to follow the 5 step guide; Check for integrated graphics card, check for latest drivers, link the monitors, and finally test the results. Best of luck!